
Homemade Artisan Bread
- Bread How-To
ThePetiteCheffe
- 20 March 2021
- 0
- 3741
Who hasn’t already experimented with homemade Bread making? Some have succeeded better than others that’s for sure, and others, like myself, have had to go through several recipes and techniques before I found this fail free recipe!
For bread making I always buy organic flour and I go for the semi whole wheat type 65
The exciting thing about making bread at home is that you will never have the same loaf twice! And this is all due mainly to … the weather! Yes, you heard me correctly! The wetter and more humid the weather, the wetter your dough! So bare that in mind when adding the water to your flour, it is very important to do so gradually, allowing you enough time to evaluate the situation. I like making my dough using my multi purpose Magimix blender, but it is totally fine if you wish to make yours by hand
This recipe requires a Dutch oven, but if you don’t have one, you can make it in any pot (and it’s lid) that can entirely go into the oven
Ingredients
- 360g Bread Flour
- 1 1/2 tsp Salt
- 1/2 tsp Dry Active Yeast
- 250ml Lukewarm Water
How to Make It
Step 1
Mix the flour, salt and Yeast together
Step 2
Gradually pour in the water and continue to mix
You might need more or less water, depending on the weather. On humid days the water quantity will suffice but on a dryer day you might need to add a bit more water. On the whole, the texture of your dough will be on the soft side rather than on the dry side, but you don’t want it to be too dry
*My journey with bread making has taught me that you will never have the same loaf twice, and with time you will understand what works best for you, a humid dough or a dryer one
Step 3
Place the dough in a large bowl and cover with cling film and set aside for proofing. This will take from 6 to 8 hours, but if you start the dough in the evening, do not hesitate to let it rest in a warm place (a turned off oven for example) overnight. The longer you leave your dough to proof the better. In this demonstrated recipe, my dough rested for 6 hours only
Step 4
Towards the end of the proofing time, turn your oven on to 220°C and place your Dutch Oven, with the lid inside to heat
Step 5
Remove the dough from the bowl and place onto a floured surface
Step 6
Fold the sides into the middle of your dough. Pull the sides away from the center and fold into the centre again. Repeat several times and until you have a ball shaped dough
Flip it over and give it a few turns to finish shaping the dough
Step 7
Remove the Dutch oven from the oven
CAUTION: Place the ball of dough into the now very hot Dutch Oven
Step 8
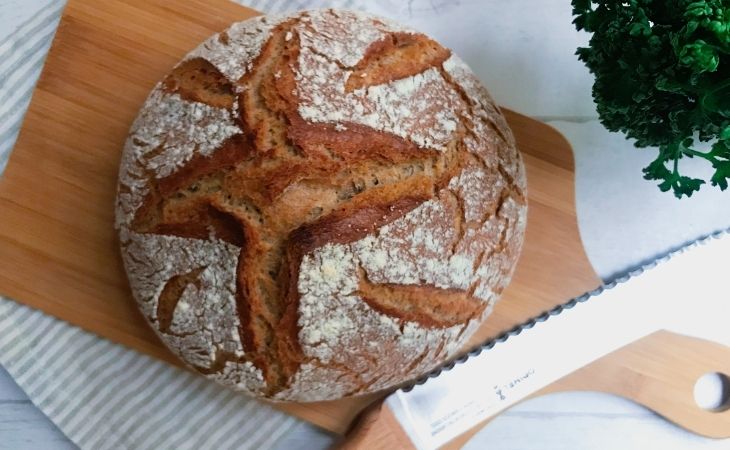
It is optional to score the dough using either a sharp blade or a sharp knife, then sprinkle with some flour
Cover the Dutch oven with the hot lid and place into the oven for 30 minutes
Once the timer goes off, remove the lid and place the dutch oven back into the oven for a further 10-15 minutes, this will work on adding some crisp and colour to your bread
Step 9
Remove the bread very carefully (remember the dutch oven is extremely hot) and place onto a cooling rack and enjoy once it has completely cooled down
To store your bread, cover it with a clean kitchen towel